Installing Olympus PRO is as simple as with any other plugin, the installation process is the very same, however, with a few additional steps, which are detailed below.
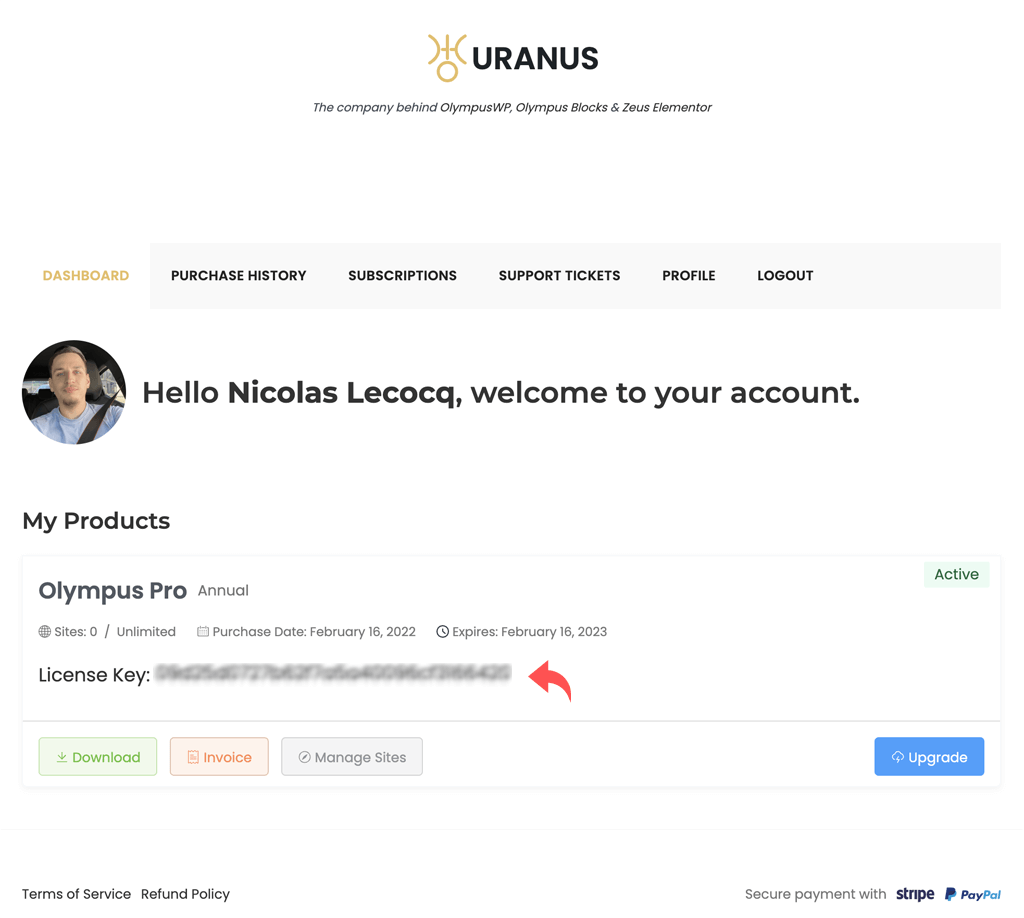
To install the Olympus PRO plugin, first access your account, and download the plugin to your computer.

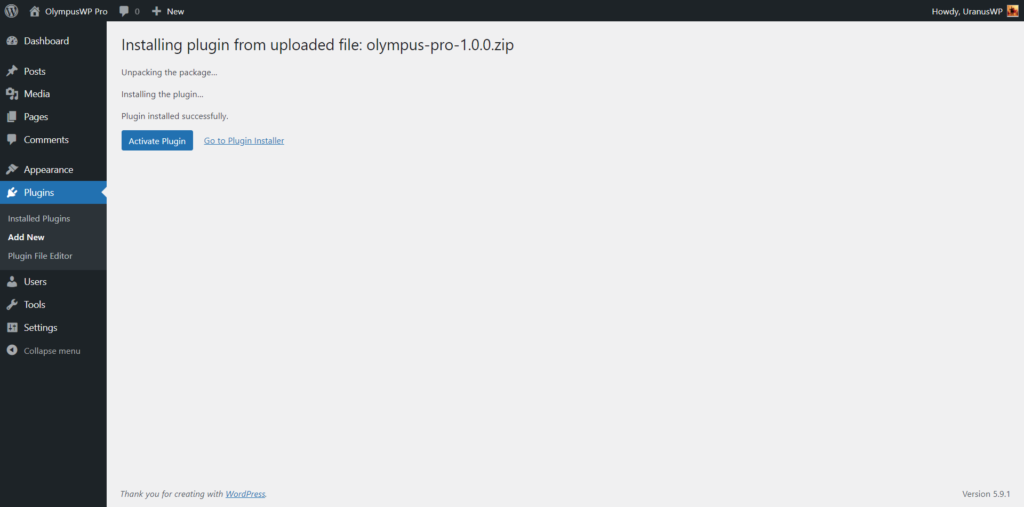
After doing so, please login to your WordPress dashboard and go to Plugins > Add New, proceed to click the button that reads Upload Plugin, followed by Choose file. From your computer folder, click to select the zipped folder you previously downloaded from your account, and then click on the button that reads Install Now.

Depending on your hosting, installing the plugin should take a mere few seconds.
Once it is installed, please press the button that reads Activate Plugin to enable it.

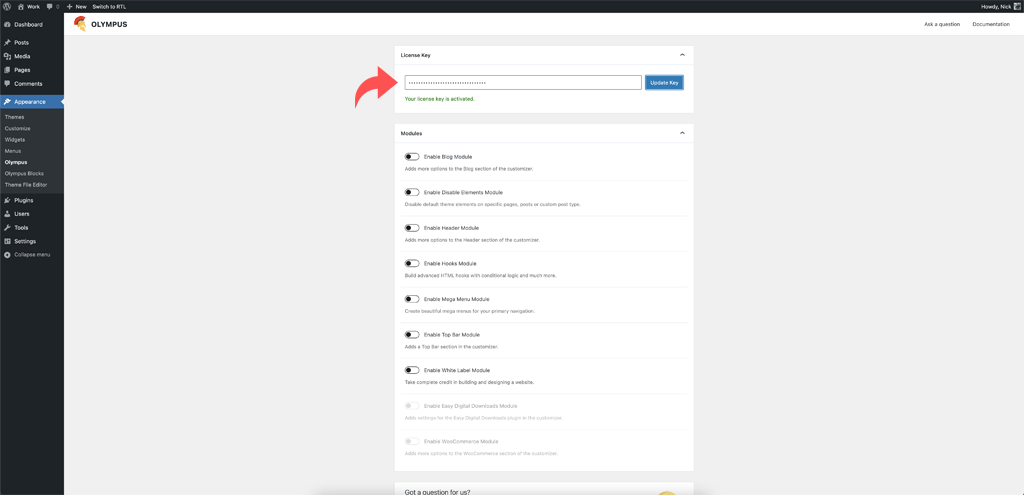
After activating the plugin, you will notice on your sidebar that there is a new menu item called Olympus, please proceed to click on it, this will open the Olympus PRO dashboard.

The first panel invite you to enter your license key which is recommended to always keep Olympus Pro updated, so go to your account and copy your license key.

To finish, go back to your dashboard, under Appearance > Olympus and paste your license key under the License Key panel and click the Save Key button to validate it, if your license is valid, you will see a success message and will be able to receive automatic updates for Olympus Pro.

